Science
Frogs and Toads Together: Why do Amphibians Group Up?April 11, 2025

An elementary teacher science blog
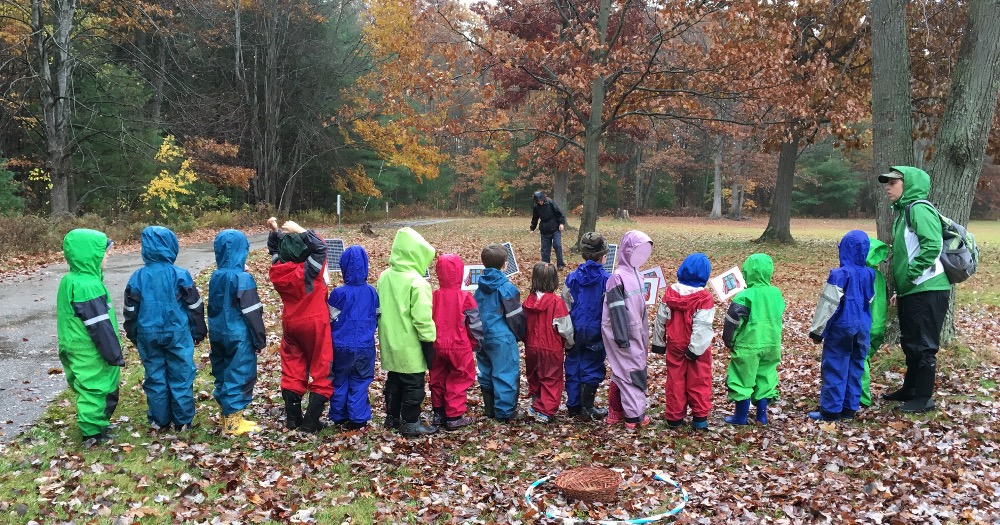
Water is an essential part of weather and March and November are fantastic times to investigate this phenomenon. Water is critical in creating many of the weather conditions we experience including clouds, rain, thunderstorms, wind, humidity, and more. So let’s take advantage of this month with variable weather to learn more about water’s role!
In this episode, we’ll talk about activities to investigate water in weather that are paired with Next Generation Science Standards for grades 2nd and 5th. I’ll share the standard that inspired the activity, how the activity relates to water in weather, and descriptions of how to use the activity with your learners.
The following standards are paired with activities about water in weather:
[0:00]
Teaching elementary-aged children is a rewarding experience, but as educators and parents, finding the time and resources to create engaging lessons can be a challenge. That's where this podcast comes in. Welcome to Naturally Teaching Elementary.
I'm Victoria Zablocki, a certified elementary teacher turned outdoor educator. With over a decade of experience coaching teachers on effective teaching methods, I'm passionate about teaching the whole child with authentic and place-based experiences in school and home settings. Join me as we explore our strategies for teaching with practical teaching tips, insightful interviews, picture book reviews, and more.
So let's grow together. All right. Welcome back to the Naturally Teaching Elementary Podcast.
My name is Victoria Zablocki and I'm your host. If you listened to last week's episode, Episode 61: Illumination and Weather: First and Fourth Grade Next Generation Science Standard Activities, you heard a couple of ideas for taking first and fourth graders outside in different weather conditions to develop an understanding of illumination and its role in seeing objects. This week, we'll continue the theme of weather, but more specifically, we'll focus on water and weather in connection to second and fifth grade Next Generation Science Standards.
Second and fifth grade standards have water properties in common, and luckily, water plays a huge role in weather. In this episode, I'm going to describe water and weather activities for grades second and fifth. For each activity, I'll share the Next Generation Science Standard that inspired that activity as well as the scientific phenomenon that that activity helps explain.
And make sure you listen through to the end of the episode because even though I've paired these activities to particular standards, you may find yourself inspired to use a similar concept for your curriculum or even use the same activity for a different grade. Also, if you're new to taking your students outside for learning, check out Episode 6: 5 Outdoor Education Safety Tips for Teaching Outside for suggestions to make teaching outside easier. Now, let's get into these water and weather activities.
[1:59]
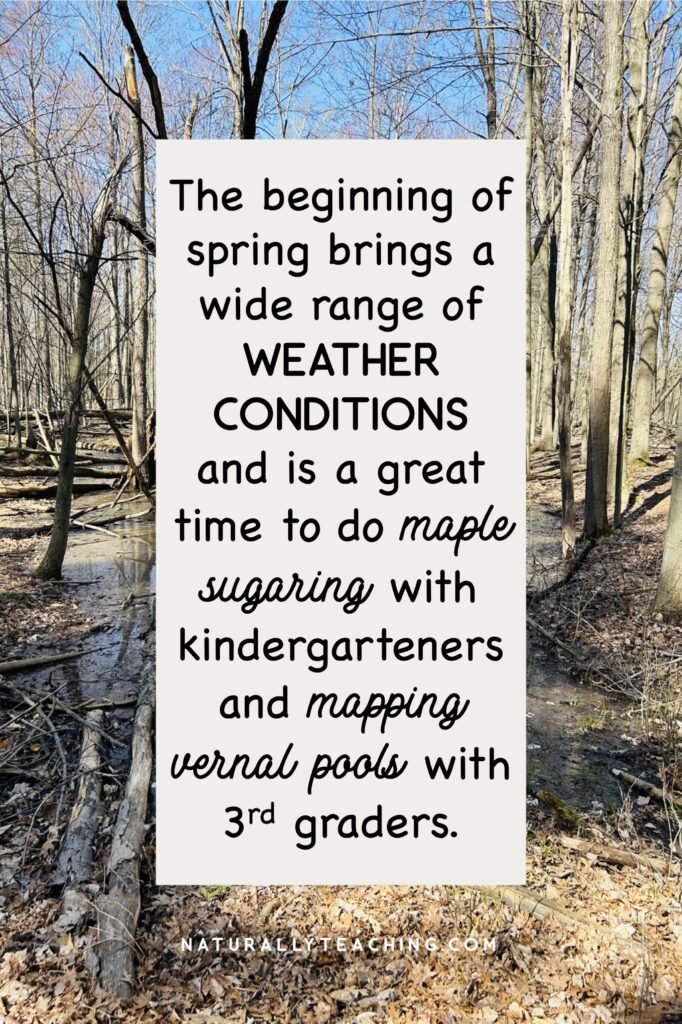
So for second grade, the Next Generation Science Standard that I pulled was 2-ESS2-3: Obtain information to identify where water is found on Earth and that it can be solid or liquid. So for the activity for second grade, consider delving into the amazing world of maple sugaring. This is a very place-based opportunity during the spring, but its interesting process can actually be studied even without the trees and weather that make it happen.
It is currently maple sugaring season here in Michigan, which isn't something that you can put specific dates on the calendar for every year. What makes this phenomenon unique is that it requires very specific weather to make happen. We know maple syrup season is here when the temperatures are above freezing during the day and below freezing at night.
The change in the amount of sunlight as winter gives way to spring tells the trees it's time to come out of their sleep or dormancy, and thus their stored food changes from starch in the roots to the liquid sap that moves up the trunk. And then when the temperatures have reached that magical arrangement of above freezing during the day and below freezing at night, that's when the sap gets its movement. If you live in an area that has the right weather and trees to make maple syrup, I'd suggest giving tapping and boiling a try with your learners.
The kinds of trees that provide the best sap for making maple syrup include Sugar maples, Black maples, and Red maples. If you're not sure if your tree is a maple, you can look at its bark, buds, and branches to tell. Here in Michigan, maples are some of the only trees that have opposite branching, meaning their branches grow directly opposite each other from the mother branch.
Sugar maples have brown buds with three bumps at the end of each branch that look like a pattern. A small bump, a slightly bigger bump, and then a small bump that matches the first. The bark of sugar maples is a grayish color and bumpy.
If you find a tree with these three characteristics, you've likely found a sugar maple, but you can also check the forest floor to see if you can find any maple leaves. If there are no maple leaves around, you may have misidentified the tree as a maple. If you end up finding a maple tree and you start to get the maple sugaring weather, you could tap the tree by getting a hold of a spile and some sort of container to collect the sap.
These containers could be a food grade bucket, a maple sugaring bag, a stainless steel bucket with lid, etc. To tap a tree, you're going to drill a hole in the tree about 2 to 4 feet above the ground. When drilling, make sure that the hole isn't parallel with the ground or drilled at a downward angle into the tree.
You want gravity to help you collect sap, so make sure there's a slight upward angle to your drill bit when you make your hole. Only drill in about 3 inches so that you get into the inner bark of the tree, but not too far. Gently tap in the spile with the hammer, but not so far that it'll be difficult to get out at the end of the season.
You want to be careful to take care of your tree so that you can use it again for years to come. In addition, to keep your tree healthy, make sure to only put in an appropriate number of taps so that you're not over-harvesting the sap the tree needs to open its buds in the spring. If you have a tree that's less than 10 inches in diameter, don't tap it. It's too little.
If it's 10 to 14 inches, you can put one tap in. If it's 15 to 19 inches in diameter, you can put two taps in. If you're doing this for fun or as a study with your learners, you can make it a habit to only place two taps in your largest trees to help them stay healthy. Once you have the tree tapped, you can visit your tap with your learners regularly, looking at the amount of sap in your collection container. Is there a lot today?
What were the temperatures like the night before? Is it below or above freezing today? There will be days when there is a lot of sap flowing and other days when you'll have nothing new.
You may even end up with a sapsicle, frozen sap, stuck to the end of your spile. Since sap is made up mostly of water and a little bit of sugar, it looks and acts like water and will freeze when the temperatures are below freezing. If you don't want to go through the boiling process, you could gather the sap and pass it along to someone else that may be doing maple sugaring.
As far as maple sugaring is concerned, most informed people view maple sap as an invaluable resource and would hate to see it go to waste. If you're interested in doing the boiling process with your learners, it would give this project a full circle water cycle experience since you're boiling the water out of the sap to leave a higher sugar content. You could do this outside on a camp stove, in a turkey boiler, or on a grill.
It's not advised to cook your whole batch down inside as it puts a lot of water vapor into the air and can compromise your wallpaper and paint of your building. You'll need to get administrator permission to do this project since it involves a heat source that would need to be manned by an adult at all times, and it can take the entire day of school to get through one batch. If you get the go-ahead from administration, you can consider asking for a caregiver volunteer to stay and man the heat source to keep kiddos safe and to also keep your syrup from burning.
At the beginning, they likely won't need to watch the sap super closely because it's 95 to 97% water, but as the water boils out, there will be less water and more sugar and can scorch on the bottom. If you boil as a class, make sure to pop in and check on the process, talking about evaporation, the water leaving the process as a gas, and looking at how the liquid changes inside the pot. As the batch boils down, you'll see a color change from clear to a light brown, continuing to become a darker brown as more water is boiled out.
As you're approaching the end, you'll notice that the thickness or viscosity of the sap changes from resembling water to a thicker substance. You can tell that you've got syrup when the temperature of the mixture climbs to 219 degrees Fahrenheit or 104 degrees Celsius. This isn't the most scientific way of knowing when sap is syrup, but it works best for in-home or in-school production.
You can then finish the syrup off by dumping it through double or tripled up coffee filters inside a container. I would like to note that many licensed locations, including public schools and private preschools, may not be able to ingest class-made syrup. In order to be consumed, many times it has to go through a very specific process that allows it to be commercial grade, and it's likely you don't have what you need to do that.
If you check in with your admin and you're not allowed to consume it, you personally may have to take it to your home and eat it. You could go through the process and then provide your learners 100% maple syrup from a store so that they can experience what it tastes like, but also be safe and in compliance with licensing. Once you've gone from sap to syrup, review the process with your learners using water cycle words such as freezing, melting, boiling, evaporating, condensing, etc.
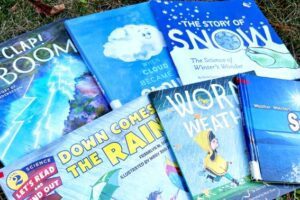
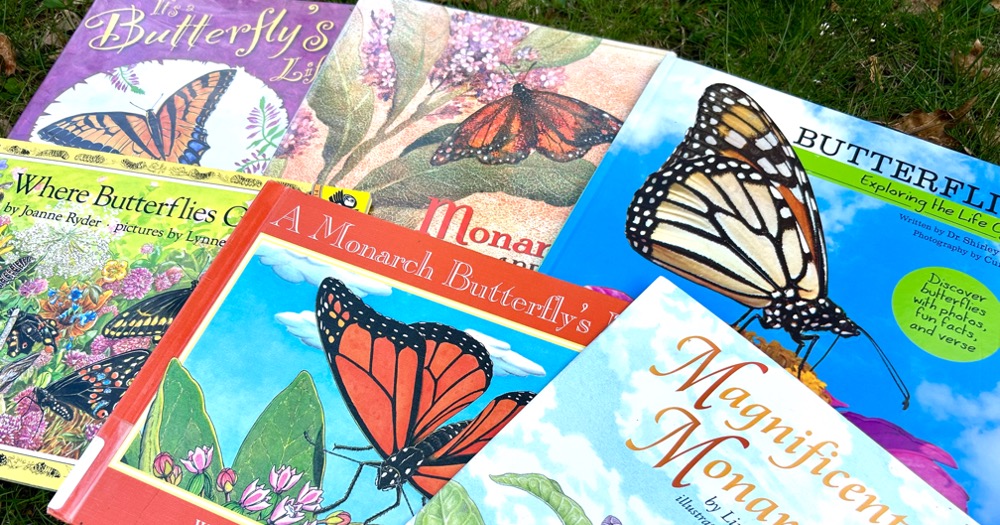
This process truly involves the water cycle and is a fantastic opportunity to engage your learners. After all that is said, if you don't have the right weather and trees to do maple sugaring in your own green space and you're super jazzed about its connection to water and weather, consider studying the process through videos and picture books. There are a bunch of different videos on YouTube that share the process, and I've got an article called “Tapping into Learning: 15 Maple Syrup Books for Elementary Science” that includes 15 picture books about maple syrup that are wonderful for early learners.
You can also check out my article, “How Maple Syrup Season Can Help You Teach Elementary Students” for more background information on maple sugaring, as well as more activity ideas for learners Kindergarten through 5th Grade. I also have a mini unit on Teachers Pay Teachers called Maple Syrup and Water Cycle Mini Unit for Second Grade that includes a variety of language arts and science activities to pair with the maple sugaring process for second graders.
[9:23]
For fifth grade, the Next Generation Science Standard that I pulled was 5-ESS2-2: Describe and graph the amounts and percentages of water and freshwater in various reservoirs to provide evidence about the distribution of water on Earth.
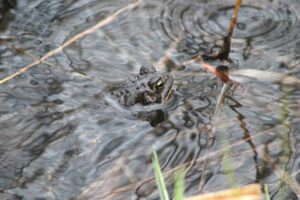
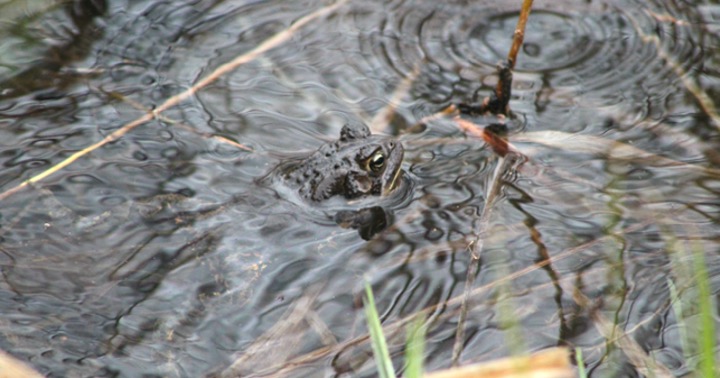
For the activity for fifth grade, I suggest mapping vernal pools or standing water in your green space. If you're unfamiliar with vernal pools, they're temporary ponds, usually in forests, that are filled by snowmelt and spring rain and typically disappear by early to midsummer. These temporary wetlands are important for spring animals, as they provide liquid water after a long season of frozen water, and they also don't support predator animals like fish, since they aren't present year-round, providing frogs and invertebrates a safe nursery to lay their eggs.
So for this activity, provide your learners graph paper, a pencil, a blue colored pencil or crayon, and a clipboard, and head outside to a location that has vernal pools or standing water. As an example, I know that my son goes through a period of indoor recess because their playground ends up with standing water in the spring after the snow melts and the rain comes. This could be a good option if you don't have vernal pools.
Once you've gathered everything, head outside and explain to your learners that they're going to be mapping the standing water that they see. Before sending them loose, remind them what they should include on their map. They should include landmarks like the school, playground equipment, woodchip lines, sidewalks, etc.
They should also include a compass rose. This one you may have to help them get oriented with, but it's an important feature on each map. They will also want to add labels of important features on their map as well as a title.
You can remind them of these features while creating a master map on an anchor chart paper and you could show them which landmarks you're including, how to tell where North is, and important labels that would help someone else looking at their map actually be able to use it. And then you'll use this map as a class at the end of the lesson. Once you've shown them how to get their map set up, show them their exploration boundaries and have them look around for standing water in your exploration space.
They should add it to their map using their blue writing utensil, and then give them time to set up their map and then look around for water, at least 10 minutes, possibly 15, depending on how into the activity they are. Once they've had their time, call them back together with your attention getter and spend time adding their water to the master map that you created at the beginning of the exploration. Since each map will look different, make sure to have them pay close attention to the landmarks and then add water to the master map once they've considered the landmarks.
As each learner adds their water to the master map, you could take a poll to see how many other students found the same water and you could track that information if you'd like. This could be interesting information if you revisit this map later in the spring. This activity could be a one and done if you'd like, and you could focus on how the fresh water appeared and will only be around for a short time.
Or you could revisit this activity and repeat it toward the end of the school year so that they can see how much the water has changed. You could provide them with a different shade of blue and have them add to their previous map as well as the master map to see the changes over time.
And if you'd like a made-for-you recording sheet for this activity, check out my Citizen Science Lab: Vernal Pools mini unit on Teachers Pay Teachers. Included are a recording sheet for mapping vernal pools, an informational reading, a recording sheet for observations, a short research project, designing a scientific tool, building your scientific tool, vernal pool data collection, graphing the data, and an opinion writing.
Also, if you'd like to learn more about vernal pools and ways to interact with them with your learners, check out my article, “How Vernal Pools Can Be Used to Reach Your Curricular Goals”, and my podcast episode 46: Vernal Pool Patrol: A Citizen Science Project for Elementary Teachers and Homeschool Parents with Lindsey Harrell; Episode 47: 6 Vernal Pools and Frogs Activities Aligned with K-5 Next Generation Science Standards, and Episode 48: 9 Vernal Pool and Frog Books for Elementary Teachers and Homeschool Parents.
[13:21]
So in a nutshell, today we talked about activities for second and fifth grade about water and weather. For second grade, we talked about getting your learners involved in the maple sugaring process. And for fifth grade, we talked about mapping vernal pools or standing water in your green space.
And don't forget, if you're looking for a made-for-you recording sheet for vernal pool mapping, check out my Citizen Science Lab: Vernal Pools mini unit on Teachers Pay Teachers. And if you're looking for more ideas on how to study vernal pools with your learners, check out my article “How Vernal Pools Can Be Used to Reach Your Curricular Goals” and my podcast episodes 46 through 48.
I also have that Maple Syrup and Water Cycle mini unit for second grade for your maple sugaring needs, as well as the articles “How Maple Syrup Season Can Help You Teach Elementary Students” and “Tapping into Learning 15 Maple Syrup Books for Elementary Science”.
Thanks for taking time to listen today. I know you're busy and I truly appreciate the time we take to tune in. If you have any questions, wonderings, or water and weather activities that you use, get a hold of me on Instagram at Naturally.Teaching, or you can email me at victoria@naturallyteaching.com.
Don't forget to check out the show notes for this episode at naturallyteaching.com/episode62 for all those links that I mentioned. Thanks again for joining me today. And until next time, keep exploring, keep learning, and keep naturally teaching.
Thank you so much for tuning in to today's episode of the Naturally Teaching Elementary Podcast. I hope you found it informative, inspiring, and full of actionable insights to enhance your teaching journey. Connect with me on social media for more updates, science tidbits, and additional resources.
You can find me on Instagram and Facebook at Naturally.Teaching. Let's continue the conversation and share our passion for teaching elementary-age children together. Don't forget to visit my website at naturallyteaching.com for all the show notes from today's episode.
If you enjoyed today's episode, please consider leaving a review on your favorite podcast platform. Your feedback helps me improve and reach more educators like you. Thank you again for listening, and until next time, keep exploring, keep learning, and keep Naturally Teaching.
0